If you are in trouble taking screenshots on a Windows 11 laptop or desktop and searching on the internet, “How to take a screenshot on Windows 11?”. Then this article is for you.
Taking screenshots on your Windows 11 laptop or desktop is easy with the built-in tools in Windows. I will share all the methods in this article.
A screenshot captures exactly what is displayed on your screen and saves it as an image file. Screenshots are useful for all kinds of situations – creating tutorials, reporting bugs, and images, collaborating on projects, YouTube videos, and more.
In this article, we will cover several methods of how to do screenshot on Windows on Windows 11 laptop or your PC.
how to take screenshot on Windows laptop or PC
Here, we discuss some easy methods on how to screenshot on Windows 11 or 10, and you take a screenshot easily.
Let us see these useful methods.
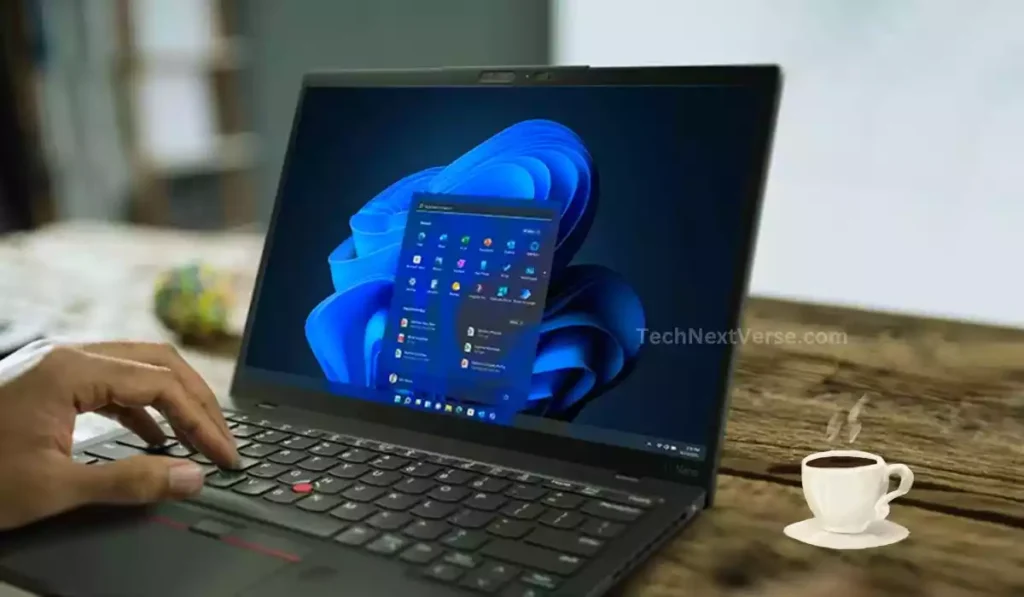
1. Use the Print Screen(PrtSc) Key
The easiest way to take a quick screenshot on Windows 11 is to use the “Print Screen (PrtScn or PrtSc)” key. The Print Screen key is usually located at the top right of your keyboard.
To take a screenshot of your entire screen, simply press the “Windows key + PrtScrn (PrtScn or PrtSc)” key. This will instantly capture the contents of your display in Windows 11 and copy it to your clipboard. The screenshot is now saved in the “Screenshot” folder under the “Pictures” folder in “.png” format.
Here is the location like this – “C:\Users\admin\Pictures\Screenshots“. Now, You can then paste the screenshot image into a document or image editing program like Paint.
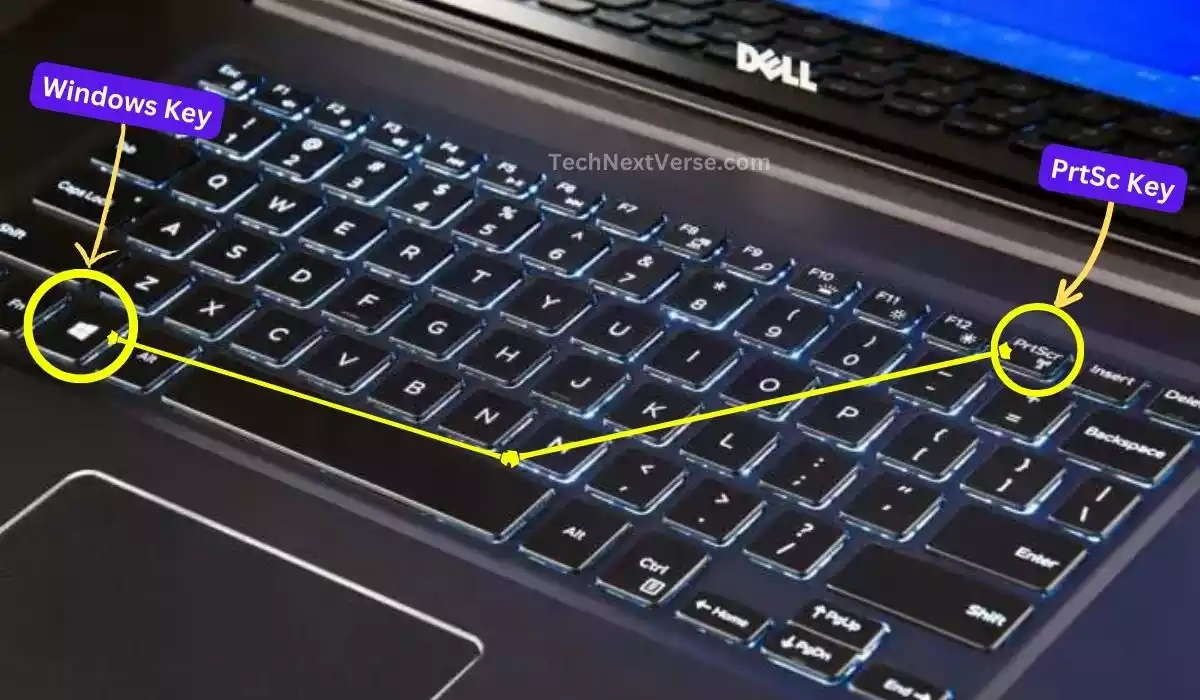
Here are the key steps to using the Print Screen key to take screenshots on Windows
2. Now press the “Windows logo key + PrtScrn” key together.
3. Then Windows 11 captures a screenshot of your entire display.
4. The screenshot is now saved in the “Screenshot” folder under the “Pictures” folder in “.png” format.
The main benefit of using Print Screen is how quick and easy it is.
If you only want to capture a portion of your screen, press the “Windows logo key + Shift + S” keyboard shortcut instead. This will open a snipping toolbar that allows you to click and drag to select the area you want to capture.
The selected area of your screen will be copied to the clipboard. Now you understand how to take a screenshot on Windows.
2. Use the Snipping Tool
For more control over your screenshots, use the Snipping Tool app. The Snipping Tool has been a part of Windows for years, and it still ships with Windows 11.
To open the Snipping Tool, type “snipping” into the search box on the taskbar and select the Snipping Tool app. Alternatively, you can press “Windows + Shift + S” to open it immediately.
Sometimes, you are searching for how to screenshot on Windows without print screen, so this method is useful for you.
▶ Take screenshot on Windows 11 with the Snipping Tool
- Open Start in Windows 11, and the search box on the taskbar, type “Snipping Tool”.

- Or you can press “Windows + Shift + S” to open it immediately on the window screen.

In the Snipping Tool, you have several options :
- Free-form Snip – Click and drag to select any area you want.
- Rectangular Snip – Click and drag to select a rectangular area.
- Window Snip – Select an open window mode to capture.
- Full-screen Snip – Captures the entire screen.
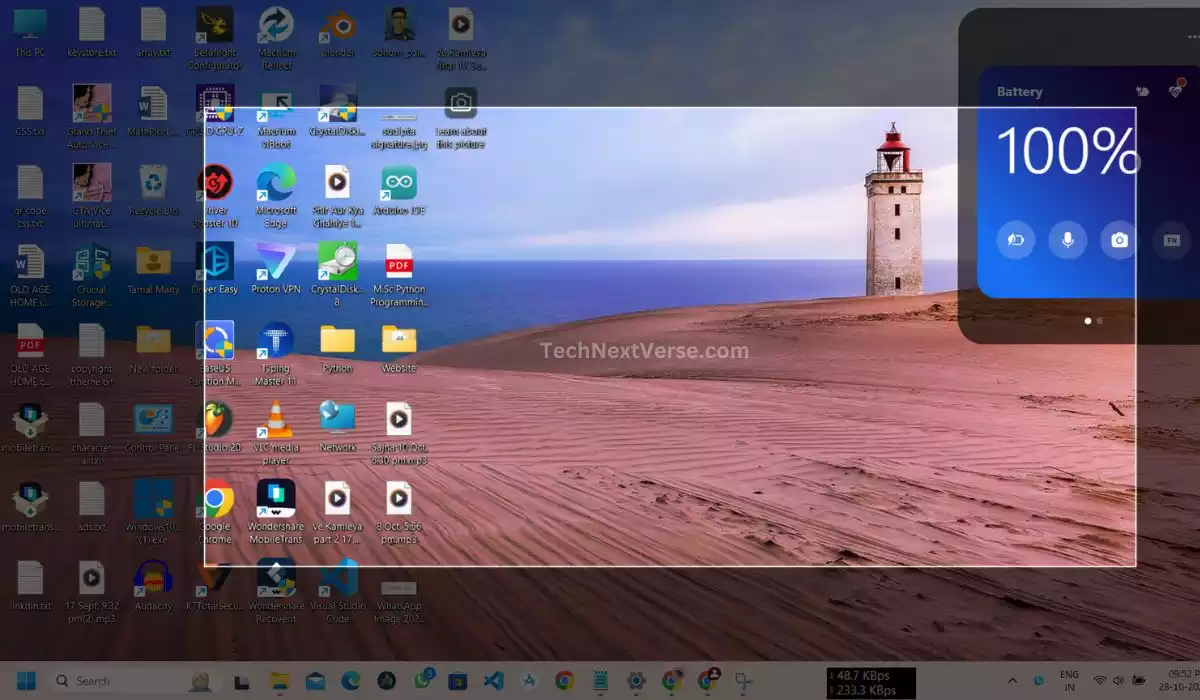
- After capturing your screenshot, you can annotate it by adding text, arrows, and more. Now you click the save button and save it.
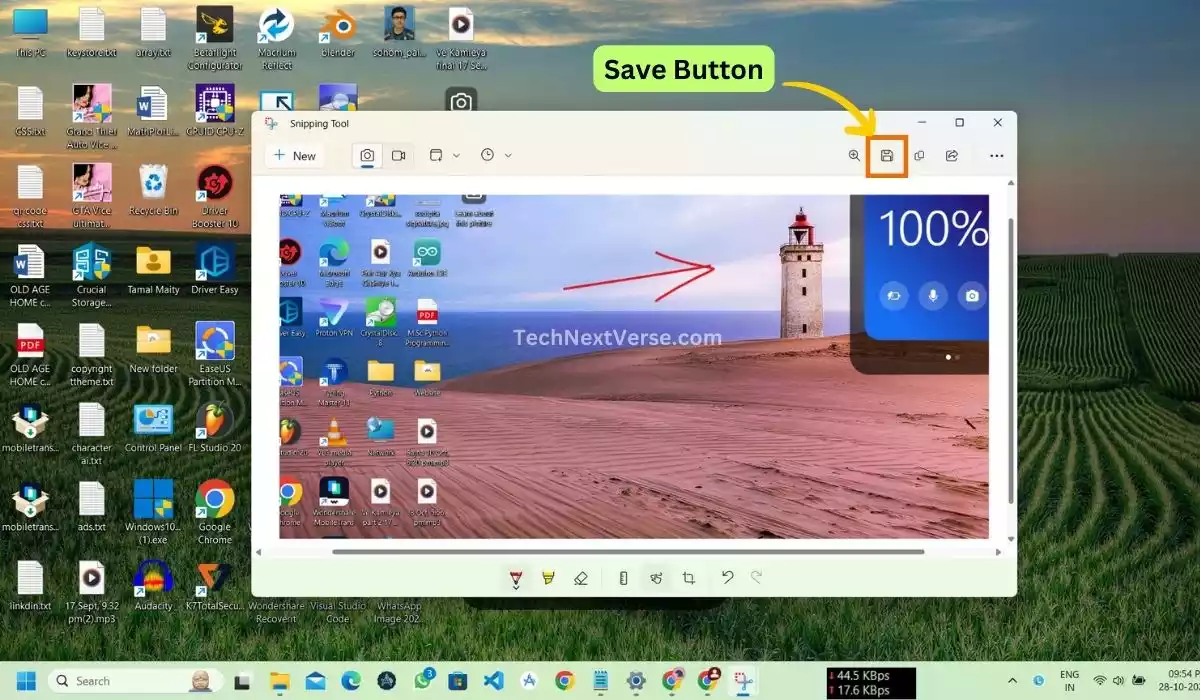
- When you’re done, click the Save icon to save your screenshot as an image file to your Pictures > Screenshots folder. The Snipping Tool gives you a lot more flexibility than just pressing Print Screen.
3. Use Game Bar
Windows 11 includes a hidden gaming overlay called Game Bar. Game Bar was designed to let you record gaming footage and screenshots, but it works for any application.
To open Game Bar, press “Windows logo key + G “. This brings up the Game Bar overlay. Click the Camera icon to take a screenshot. You’ll see options for standard screenshots, as well as a timed or continuous screenshot mode.
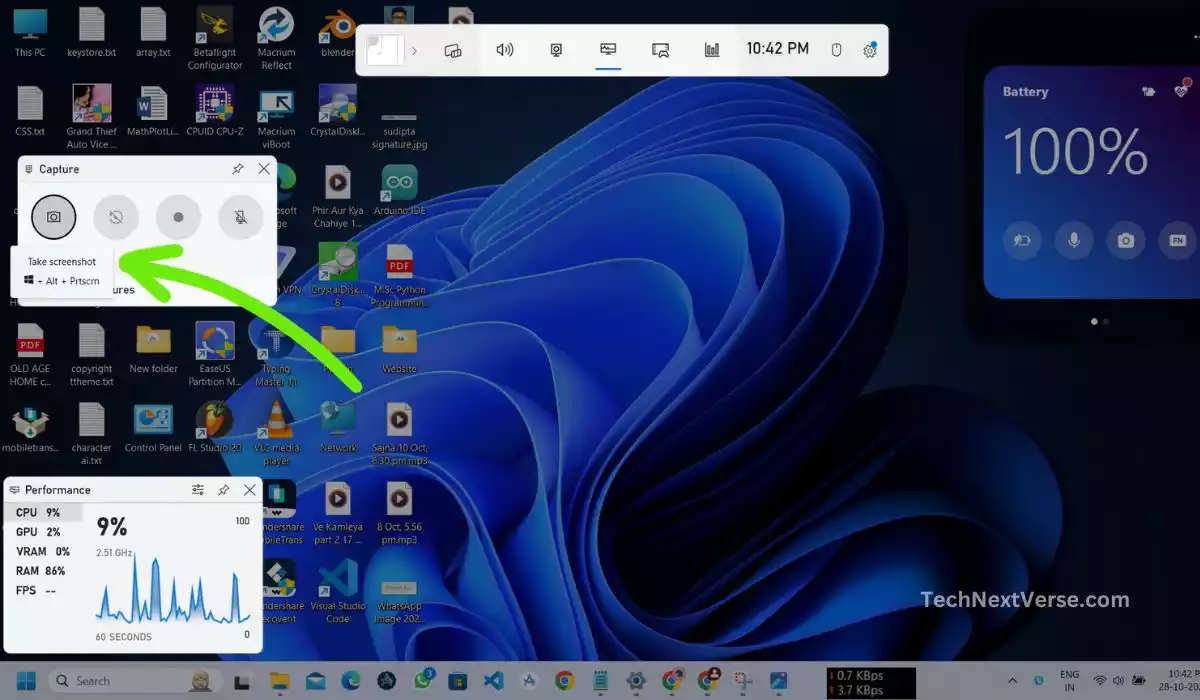
After taking your screenshot, click the notification that appears in the upper right. This will let you open the screenshot in the Photos app, where you can edit, draw on, and share it.
Game Bar also includes screen recording, streaming integration, and performance metrics overlays. It’s a very useful utility for more than just gaming.
4. Using Screenshot Software
If you are looking for how to screenshot on Windows with multiple screens then this tool helps you.
There are also many great third-party screenshot tools available for Windows. Here are some of the popular options:
- Lightshot – Extremely lightweight app that adds an instant screenshot tool to your right-click context menu. Has built-in editing and sharing options.
- ShareX – Open source app with advanced screen capture capabilities, file uploads, and integrations with external services.
- Snagit – Full-featured premium software with advanced tools for editing, annotating, and sharing screenshots.
- Greenshot – Popular free utility with a wealth of capture, editing, and output options. Open source.
In this way, you can find out how to take screenshot on windows 11 laptop and PC.
How to screenshot on Windows 7?
Here are 3 common ways to take a screenshot on a Windows PC
2. Windows key + Shift + S – Bring up a snipping toolbar to grab specific portions of your screen.
3. Windows key + G – Open the Game Bar interface by pressing Windows key + G. The Game Bar has a camera icon that allows you to take screenshots of games or any app
So, you have found the answer on how to take a screenshot on windows. I hope you are abled to take your screenshot without any hassle.
How to Change Your Default Screenshot Folder
By default, screenshots taken with Print Screen, Snipping Tool, and Game Bar are saved to your Pictures > Screenshots folder. But you can change this if you want your screenshots saved elsewhere.
Here’s how to change the default screenshot folder on Windows 11:
- Open Settings and go to System > Storage.
- Under Locations, click More options.
- Scroll down and click Screenshots.
- Click the Move button and select the new folder location.
Now when you take screenshots, they will automatically be saved to this custom folder.
How to screenshot on Windows Laptop?
Here are several ways to take screenshots on a Windows laptop:
1. Windows Logo Key + Shift + S:
- Similar to Snipping Tool, but activates with a keyboard shortcut.
- To capture: Press Windows key + Shift + S.
- To select area: Drag the cursor over the desired area.
- To save: The screenshot will be copied to the clipboard. You can then paste it into an image editing program or document.
2. Alt + Print Screen (PrtScn):
- Captures only the active window.
- Copies the screenshot to the clipboard. You’ll need to paste it into an image editing program or document to save it.
Additional tips:
- To quickly open the “Screenshots” folder, press Windows key + E and then navigate to “Pictures” > “Screenshots”.
- To edit screenshots, you can use built-in tools like Paint or Photos, or third-party image editing programs.
Adjust Your Screenshot Settings
If you frequently take screenshots, you may want to adjust a few settings to customize the experience. Here are a couple of settings to check:
In Settings > Accessibility, you can turn on Screenshot Reader. This uses optical character recognition (OCR) to detect text in your screenshots. The text can then be read aloud or copied.
In Settings > Ease of Access > Keyboard, you can set your Print Screen shortcut instead of having to use the dedicated key. For example, you can set it to Windows + S if that’s easier to press. In this way, you know how to take a screenshot on a gateway laptop Windows 11.
Final Thoughts
So, in summary, those are several handy ways you can take screenshots easily on your Windows laptop or desktop.
I hope you don’t have to search on “how to screenshot on windows” again in future. This methods are also applicable on Windows 10 and 11 also.
From just pressing Print Screen to utilizing advanced capture software, you have lots of flexibility.
Read Also :
FAQs
What is the shortcut key for screenshot on laptop?
The shortcut key is “Windows + Print Screen” or “Windows key + PrtSc”. It takes a screenshot of the entire screen and saves it to the Pictures « Screenshots folder.
Where do Screenshots go on Windows 11?
On Windows 11, screenshots taken using built-in tools like Print Screen, Snipping Tool, or Game Bar are saved to the Pictures > Screenshots folder by default.
Specifically, the default location is:
C:\Users\YOURUSERNAME\Pictures\ScreenshotsHow do I take a screenshot on my laptop without a Windows key?
Use the Snipping Tool – Open the Snipping Tool app in the search box and use it to select and capture screenshots. This doesn’t require the Windows key. Alternatively, you can press “Windows + Shift + S” to open it immediately.
How do I take a full screenshot on my PC?
Ans: To take a full screenshot of the entire screen, just press the Windows key and the Print Screen (i.e., PrtSc) and immediately Windows capture the full screenshot and saves it in the Pictures > Screenshots folder by default.
What are 3 ways to take a screenshot on a PC?
Ans: Here are 3 common ways to take a screenshot on a Windows PC:
1. Print Screen key – Pressing the “Windows key + Print Screen” key will capture a screenshot of your entire display.
2. Snipping Tool – You press “Windows + Shift + S” to open it immediately.This app included with Windows allows you to take customized screenshots. You can capture full screens, rectangles, windows, or freeform shapes. It also allows basic editing before saving.
3. Game Bar – Open the Game Bar interface by pressing “Windows key + G”. The Game Bar has a camera icon that allows you to take screenshots of games or any app.
